How to Setup your E-mail Account - Apple Mail for Mac OS X
This document will show you how to configure Mac Mail on an Apple Mac OS X computer to be able to send and receive your e-mail.
1 - Open Mail.

2 - The Welcome to Mail screen should pop up.
If you are not setting up Apple Mail for the first time, follow steps 5 to 7 and click on the + sign in the lower left-hand corner of the Accounts screen to add your new account.
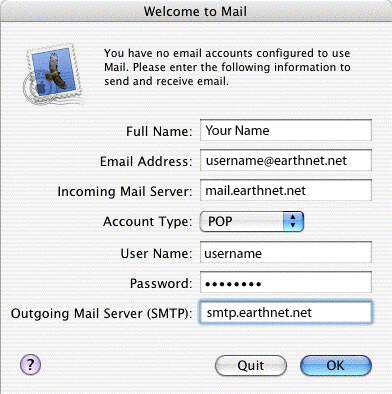
- In the Full Name field, type your dispay name (it will appear on the From field when you send out messages)
- In the Email Address field, type your full Earthnet email address, for example username@earthnet.net
- In the Incoming mail server field, type in: mail.earthnet.net
- Click the arrow box on the Account Type pop-up list and choose POP
- In the User Name field, type your username.
Your username is usually the first part of your Earthnet email address, for example johndoe if your email address is johndoe@earthnet.net. - In the Password field, type your Earthnet email password.
- In the Outgoing Mail Server (SMTP) field, type in: smtp.earthnet.net
- Click the OK button.
Note: At this point, Mail will attempt to contact the mail server. If it fails, click the Continue button on the warning message that appears to continue with the set up.
3 - Click the No button when asked if you want to import mailboxes.
4 - Click the No button when asked if you want to see what's new.
5 - From the
Mail menu, choose Preferences.
6 - Click the Accounts icon.

7 - Click the Server Settings button in the lower section of your account information.
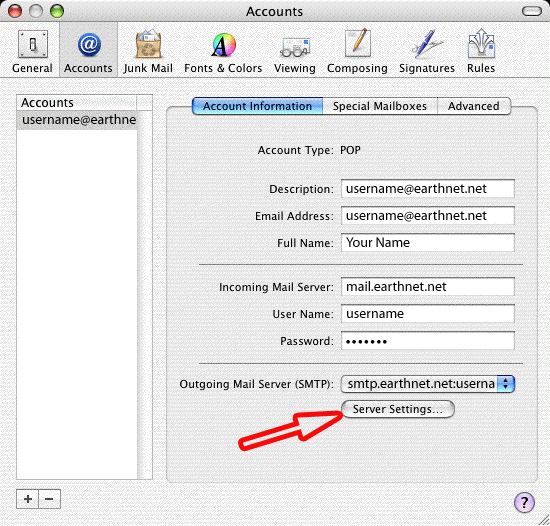
8 - A dialog box called SMTP Server Options will pop up.
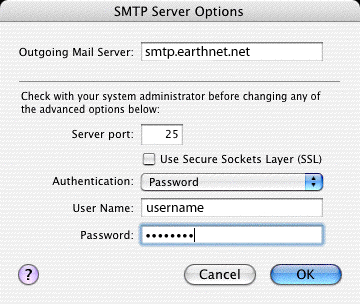
- In the Outgoing Mail Server field, type in: smtp.earthnet.net
- Server port should be left to 25
- The checkbox called Use Secure Sockets Layer (SSL) should NOT be checked
- Click the arrow box on the Authentication pop-up list and choose Password
- In the User Name field, type your Earthnet username
- In the Password field, type your password
- Click the OK button
9 - Close the Accounts window, and click the Save button.
Congratulations, you have finished setting up your email account!