How to Setup your E-mail Account - Microsoft Office Outlook 2003
This document will show you how to configure Outlook 2003 to be able to send and receive your e-mail.
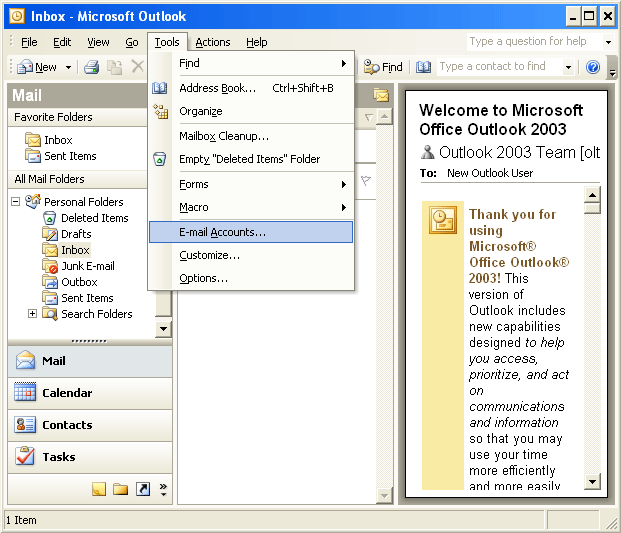
1 - Open Outlook 2003, go to the Tools menu and choose E-mail Accounts:
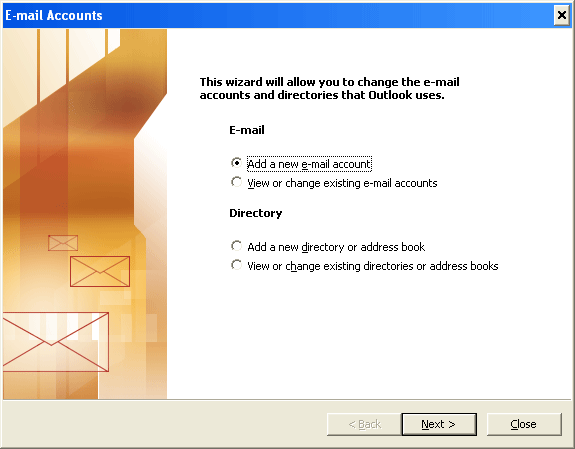
2 - A wizard will pop-up. Please select the first radio button named Add a new e-mail account, and click Next.
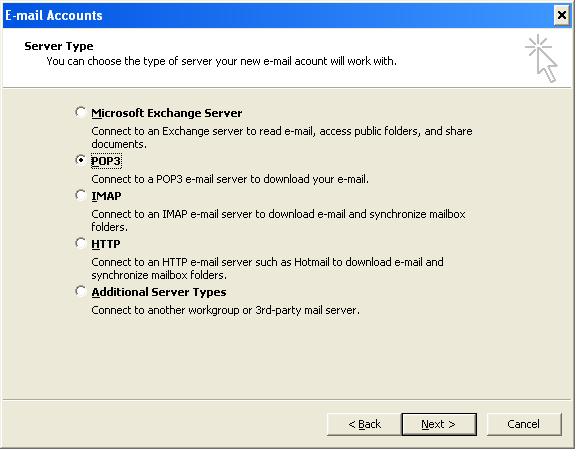
3 - Select the 2nd radio button called POP3 for the Server Type (unless you wish to use IMAP instead) then click Next.
4 - You should now be on a screen called Internet E-mail Settings (POP3) like this one:
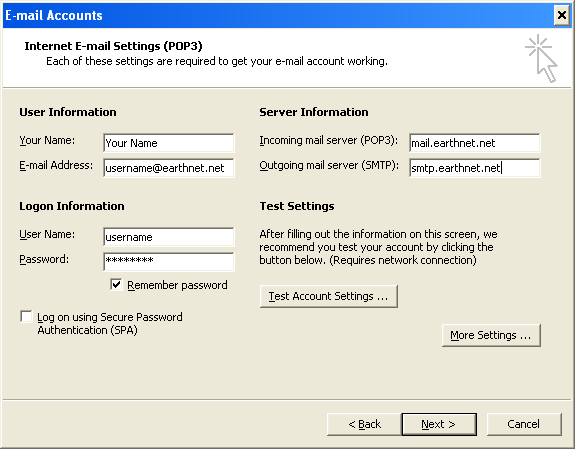
Under User Information:
- In the Your Name box, enter your display name, which is the name that will appear in the From field when you send e-mail.
- In the E-mail Address box, enter your full email address, for example johndoe@earthnet.net
Under Logon Information:
- In the User Name box, enter your Earthnet username (usually the first part of your e-mail address at Earthnet.net, for example johndoe if your e-mail address is johndoe@earthnet.net)
- In the Password box, enter your password.
- Make sure Remember Password is checked, and that Log on using Secure Password Authentication is NOT checked.
Under Server Information:
- In the Incoming Mail Server (POP3) box, enter: mail.earthnet.net
- In the Outgoing Mail Server (SMTP) box, type in: smtp.earthnet.net
- Make sure you typed everything correctly (for example, make sure you did not type smpt instead of smtp)
5 - Do not click Next right away, instead, click the More Settings button in the lower right-hand corner. This should pop up the following window:
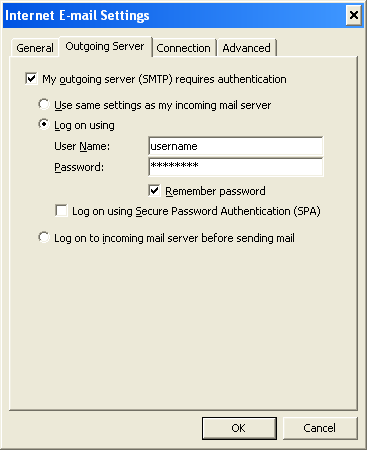
- Go to the 2nd tab called Outgoing Server,
- check the box at the top that says My outgoing server (SMTP) requires authentication,
- select the 2nd radio button called Log on using,
- enter your username and your password in the appropriate boxes,
- make sure Remember password is checked,
- do NOT check the box that says Log on using secure password authentication (SPA)
When you're done, click OK to confirm the changes.
This
will take you back to the Internet E-mail Settings (POP3) window.
From there, you can click Next and then Finish to finish creating your account.
Congratulations, you are now ready to send and receive your e-mail!